TL;DR

Get kitchen staples and gadgets delivered free — and shop member deals
- Fast, free delivery on millions of items
- Access to Prime Big Deal Days deals on October 6–7
- Prime Video, Amazon Music and more included
A spooky Halloween cake decorating kit can turn a homemade or store-bought cake into a themed centerpiece, but kits vary from simple edible toppers to reusable piping and fondant tools. Check what the package includes, how many cakes it covers, whether decorations are edible, and what allergens they contain before you buy.
A plastic spider on a cake may look delightfully creepy; a plastic spider mistaken for an edible decoration is a less charming surprise. Halloween cake kits vary widely, and a little label-reading can save you money, time, and a serving-time scramble.
Some kits offer only sprinkles and ready-made toppers. Others include piping bags, cutters, stencils, or fondant tools for a hands-on design. This guide shows you what to check, how to match a kit to your skill and guest list, and how to decorate with food safety in mind.
Whether you’re dressing up a homemade layer cake or adding spooky flair to a store-bought one, you can get a polished result without turning your kitchen into a haunted workshop. The trick is to plan the look first, then choose the kit that actually helps you make it.
Read the contents list: many kits do not include cake, frosting, or every tool shown in product photos.
Match the kit to your plan: toppers and sprinkles suit beginners, while piping and fondant tools take practice.
Check that every decoration touching food is labeled edible; remove plastic or paper toppers before serving.
Review allergen statements for every edible component, including sprinkles and icing decorations.
Cool the cake fully, decorate with a simple focal point, and follow storage guidance for food and decorations.
What a Halloween cake decorating kit actually includes
A spooky Halloween cake decorating kit is a package of themed decorations, tools, or both, designed to dress up a cake or other baked treats. Some kits are little more than a sprinkle blend and a few toppers; others add piping tips, cutters, stencils, or fondant tools. The label—not the product photo—tells you what arrives.
That difference matters when you’re shopping on a deadline. Imagine buying a kit for a black-and-orange birthday cake, then discovering it contains plastic picks and two packets of sprinkles but no frosting, piping bag, or edible eyes. It can still work, but you’ll need to supply the rest. Treat the kit like a recipe: check the ingredients and equipment before you start.
Look at the contents list, serving estimate, and whether each piece is edible, reusable, or single-use. Common edible items include sprinkles and icing decorations. Reusable tools can include cutters and piping tips. Paper, plastic, and some decorative picks may be intended for display only, not eating. These categories affect more than what you can eat: reusable tools may offer better value if you bake often, while ready-made decorations save time but may leave you with few useful leftovers.
Current products and seasonal stock change from year to year, so confirm the retailer’s current listing and the package when it arrives. A “complete decorating set” can still mean decorations only, not a cake, frosting, food coloring, or every accessory pictured. Compare what’s included with what you already own; otherwise, an inexpensive kit can require extra purchases that make it less convenient or more costly than a simpler option. Knowing that before Halloween night makes the project much easier.
As an affiliate, we earn on qualifying purchases.
Choose a kit that fits your skill, time, and cake
The right Halloween cake decorating kit matches the design you want and the time you have to make it. For a fast, tidy finish, choose ready-made toppers and a coordinated sprinkle mix. For a hands-on afternoon, look for piping bags, cutters, or stencils—but plan for practice and extra supplies. The tradeoff is control versus convenience: tools let you customize the design, while premade details make a consistent result more achievable when time is short.
Here’s a simple comparison: a beginner decorating a grocery-store cake before a school party may get the best result from orange frosting, candy eyes, and a ghost topper. A confident baker with a quiet Saturday can use a piping set to create spiderweb lines or use fondant cutters for bats. Neither approach is better; they just ask different things of you. A complex kit can be frustrating if there’s no time to learn the tools, while a simple kit may feel limiting if you want a highly customized cake.
| Kit style | Best for | Check before buying |
|---|---|---|
| Sprinkles and ready-made toppers | Quick, beginner-friendly decorating | Edibility, allergen details, piece count |
| Piping bags and tips | Hands-on borders, webs, and lettering | Whether bags and frosting are included |
| Fondant cutters and stencils | Precise shapes and repeatable patterns | Whether you need separate fondant or icing |
Also check coverage and compatibility. A handful of bats might decorate one small cake, not 24 cupcakes. If the package gives a piece count but no serving estimate, think through your design: a few large toppers create a focal point, while a cupcake tray needs enough pieces for repeated decoration. Match decorations to the cake’s surface, too; flat sprinkles are easy on frosting, but heavy toppers may sink into soft icing. If you’re bringing dessert across town, choose decorations that suit the trip; tall toppers and soft frosting can shift in a warm car. A decorating kit makes it easier to turn a homemade or store-bought cake into a centerpiece only when its contents fit your actual plan.
spooky cake toppers and decorations
As an affiliate, we earn on qualifying purchases.
As an affiliate, we earn on qualifying purchases.
Use this simple plan for a polished spooky cake
For a neat Halloween cake, cool the cake fully, prepare the frosting and tools, then add decorations last. This order keeps frosting from melting and stops delicate toppers from getting crushed while you work. A 20-minute setup can make decorating calmer than trying to open sprinkle packets with sticky hands. It also helps you spot missing supplies early, when there’s still time to improvise rather than discovering halfway through that a tool or ingredient is missing.
- Check the kit. Separate edible pieces from tools and non-edible toppers, and set aside anything that needs to stay sealed. This prevents accidental use of display-only pieces and keeps edible decorations clean.
- Cool and frost. Let the cake cool completely before you spread frosting; warm cake can tear and turn icing slippery. A stable, cool surface makes decorations easier to place and less likely to slide.
- Make a quick layout. Place toppers on the cake without pressing them in. For example, set a ghost near the center and scatter bats around the edge. A test layout helps you balance the design before anything is difficult to move.
- Add the details. Apply sprinkles, edible eyes, piping, or cutouts in the order that suits your design. Keep delicate pieces for the end. Adding them last reduces the chance that your hands, spatula, or frosting will smudge or bury them.
- Store and transport safely. Follow storage instructions for the cake and edible decorations, and protect the finished cake from heat and moisture. Even a well-decorated cake can lose its shape if the frosting softens or moisture affects the decorations.
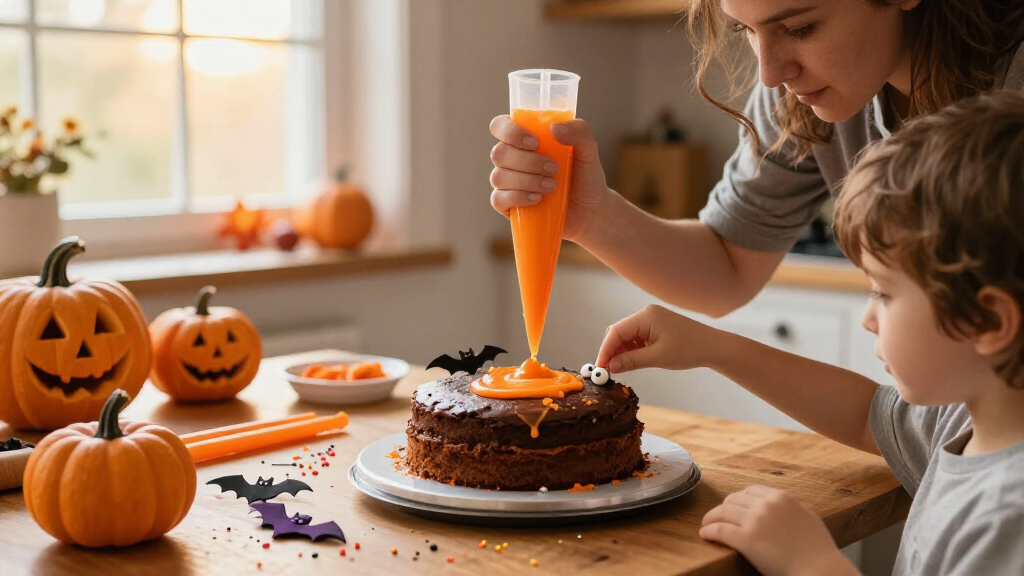
This works whether you’re making a cute spooky cake for children or a darker gothic design with black icing and silver sprinkles. If a child is helping, let them add larger decorations while an adult handles scissors, sharp tools, and piping tips. Small decorations can be choking hazards, so supervise closely and check the kit’s age guidance.
For example, you can frost a cooled 8-inch cake, add a ring of orange sprinkles, and place three edible ghosts on top. It looks planned without demanding fine piping. If your first frosting pass looks rough, treat it like a wall before paint: chill the cake briefly, smooth the surface, and add the decorations over any remaining bumps. A simple design also gives you more room to recover from small imperfections; a dense pattern makes every uneven patch more noticeable.
As an affiliate, we earn on qualifying purchases.
Check edible labels and allergens before serving
Only serve decorations clearly labeled edible and intended for food use. Some toppers are plastic, paper, or otherwise non-edible, even when they sit directly on a cake. Read the package directions, remove display-only pieces before serving, and tell guests when a decoration needs to come off. This matters because decorative items can be difficult to distinguish from candy once the cake is sliced, especially for children or guests who did not see it being assembled.
This can be easy to miss when a kit’s photos show a finished cake rather than a close-up of each component. Picture a crowded family table: a child reaches for a bright spider pick, while an adult assumes it’s candy. Avoid that mix-up by identifying non-edible toppers before you bring the cake out. If necessary, leave the picks beside the cake or remove them before slicing. Removing them early is often simplest; leaving them visible can preserve the design, but requires a clear explanation and care when serving.
Read the ingredient and allergen statements on every edible item, not just the cake mix or frosting. Sprinkles and icing decorations have their own ingredients, and their dietary claims may differ from the rest of your dessert. A cake made without a particular ingredient may still be unsuitable if a decoration contains it or carries a cross-contact warning. If a guest has an allergy or dietary restriction, don’t guess from color or appearance. Follow the label, and contact the manufacturer if the information is unclear.
Food-safety check: Keep the cake and its decorations stored according to their package directions. Heat and moisture can affect frosting and edible decorations, and perishable cake toppings may need refrigeration. Don’t leave perishable food at room temperature for more than two hours, or one hour when the temperature is above 90°F.
A clear plan makes the dessert safer and less awkward: write down the ingredients, keep packaging available, and use clean hands and tools. That way, a guest can ask what’s in the cake and get a real answer—not a guess over the music. If the label or preparation conditions don’t let you confidently accommodate an allergy, offer a separate, clearly identified dessert rather than relying on appearance or assumptions.
Halloween piping and fondant tools
As an affiliate, we earn on qualifying purchases.
As an affiliate, we earn on qualifying purchases.
Make the kit work for kids, parties, and travel
A kit works best when you match its pieces to the people and place involved. For a children’s party, choose large, easy-to-handle decorations and simple tasks; for a dinner-party centerpiece, pick details that hold their shape and can travel. Small parts, scissors, and pointed piping tools need adult supervision. The goal is to give each person a manageable job without letting the activity become a safety or timing problem.
For example, a group of six-year-olds can each add a few large candy eyes or sprinkle a cupcake, while an adult handles the piping bag and sharp cutters. That keeps the activity fun without putting tiny decorations or tools in every hand. Check age guidance on the packaging, and avoid leaving small pieces within reach of very young children. If the kit includes many small items, portion them out as needed instead of setting the whole assortment on the table.
Travel changes the design, too. A tall ghost topper may look great on a kitchen counter but wobble on a bumpy 30-minute drive. Choose lower decorations, use a snug cake carrier, and keep the cake level in a cool part of the car. If the frosting or filling needs refrigeration, plan the trip and storage around that guidance rather than leaving the cake out for the afternoon. A less elaborate design may be the better choice when it means the cake arrives intact and safe to serve.
Think of the finished cake like a suitcase: the more fragile pieces you pack on top, the more likely they are to shift. You can add delicate bats or sugar decorations after you arrive. For a party spread, a kit that covers both a cake and cupcakes can create a coordinated look, but check its piece count and coverage estimate first so you don’t run short halfway through decorating. Decide whether matching every dessert matters more than having enough decorations for each one; prioritizing a few shared colors or motifs can create a cohesive spread with fewer pieces.
Get a spooky look without overcomplicating the cake
A memorable cake usually needs one clear spooky idea, not a pile of decorations. Choose a focal point—a ghost, web, pumpkin, or cluster of bats—and let the kit’s colors support it. This gives your eye somewhere to land and makes a simple homemade cake look deliberate. It also helps you use fewer pieces, which can stretch a kit across more servings and keep the design from feeling crowded.
Try a black-and-orange sprinkle mix around the edge, with a single white ghost in the middle. Or frost a store-bought chocolate cake in purple, add edible eyes, and place non-edible spider picks where everyone can see them. These designs use contrast and a small number of focal details instead of requiring professional piping skills. Keeping the main decoration distinct from the background makes it easier to recognize the theme, even if the frosting is not perfectly smooth.
Pre-made toppers and sprinkle blends are especially useful when you’re decorating after work or baking with someone new to the kitchen. If you want a more personal result, add one handmade detail: pipe a crooked web, cut a few bats from fondant, or write a short message. A decorating kit makes it easier to build from a base, but you don’t need to use every piece in the box. Leaving some decorations unused can be a better choice than forcing in details that compete with the focal point.
Keep edible decorations sealed until you’re ready to use them, and follow the package’s storage directions. Moisture can make some sprinkles bleed color, while heat can soften icing details. Add delicate pieces close to serving time if you’re unsure how they’ll hold up. This small timing choice can preserve both their appearance and texture. The result feels more like a finished Halloween centerpiece and less like every item in the kit landed on the cake at once.
Frequently Asked Questions
Are Halloween cake decorations edible?
Some are edible, and some are display-only. Check each item’s label and remove plastic or paper toppers before serving. Don’t assume a decoration is food-safe just because it sits on the cake.
Does a cake decorating kit include cake and frosting?
Often, no. Many kits contain decorations or tools only, so check the contents list for cake, frosting, piping bags, and other supplies. Product photos can show accessories that the package does not include.
Can beginners use a spooky Halloween cake kit?
Yes. Ready-made toppers and sprinkle blends are easy ways to decorate without piping experience. Piping tips and fondant cutters offer more options, but they take practice and may require separate frosting or fondant.
How many cakes or cupcakes will one kit decorate?
It depends on the size and number of decorations and how heavily you use them. Check the package’s coverage estimate; a few large toppers may suit one cake but not a full tray of cupcakes.
How can I make sure a Halloween cake kit is safe for guests with allergies?
Read the ingredient and allergen information on every edible component, including sprinkles and icing decorations. The kit’s decorations may not share the cake’s dietary claims. If the label is unclear, ask the manufacturer rather than guessing.
Conclusion
Choose your design first, then buy the kit that supplies what you actually need. Check the contents, coverage, edible labels, and allergens before decorating; a few minutes of planning can prevent a last-minute store run or a serving-time surprise.
Keep the cake cool, make one spooky detail the star, and let a few bats or ghosts do their work. The best Halloween centerpiece is the one that looks fun—and is ready to eat safely.
NFL season / tailgating Picks
team gear
As an affiliate, we earn on qualifying purchases.