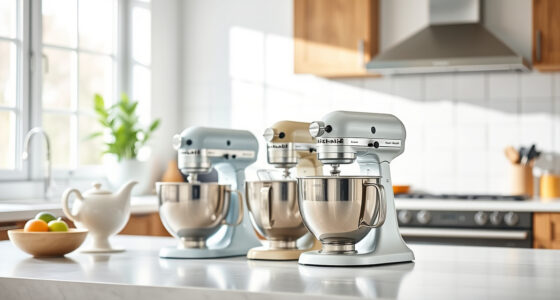

Congratulations on your new KitchenAid Artisan Series 5 Quart Tilt-Head Stand Mixer! Setting up your mixer properly ensures safety, ease of use, and the best mixing results. In this guide, we’ll walk you through the necessary steps to assemble, position, and start using your mixer confidently.

Get kitchen staples and gadgets delivered free with Prime
- Fast, free delivery on millions of items
- Prime Video, Amazon Music and more included
- Member-only deals all year
Whether you’re a seasoned baker or just getting started, following these clear instructions will help you maximize your mixer’s capabilities and enjoy years of reliable service.
Key Takeaways
| Easy assembly process | Step-by-step instructions for safe setup. |
| Proper placement tips | Ensures stability during operation. |
| Attachment compatibility | How to attach accessories correctly. |
| Safety precautions | Do’s and don’ts for safe use. |
Unboxing and Initial Inspection
- Carefully unpack your KitchenAid Artisan Stand Mixer from its box, checking for any damage during transit.
- Verify that all parts are included: mixer base, 5-quart stainless steel bowl, pouring shield, flat beater, dough hook, wire whip, and tilt-head assembly.
- Inspect each component for cracks or defects; do not use damaged parts.
- Read the user manual thoroughly before proceeding with assembly.
Attaching the Bowl and Beater
- Lift the tilt-head lock lever to raise the mixer head fully upright.
- Place the 5-quart stainless steel bowl onto the base, aligning the tabs into the slots, then turn clockwise until secure.
- Select the flat beater, dough hook, or wire whip based on your recipe needs.
- Align the attachment’s hub with the mixer’s power hub, then push down and rotate slightly clockwise to lock in place.
Adjusting and Locking the Tilt-Head
- Lower the tilt-head gently until it clicks into a locked position, ensuring it’s securely attached and stable.
- Check that the head is locked by gently trying to lift it; it should stay firmly in place.
- Ensure the lever is securely engaged before operation to prevent accidental movement.
Connecting Attachments and Accessories
For enhanced functionality, your mixer can connect to various attachments like the Food Grinder or Pasta Roller Set. Attach these accessories to the power hub at the back of the mixer base.
Ensure the attachment is compatible and securely connected before turning on the mixer. Follow specific instructions for each accessory for correct setup.
Safety and Operational Tips
- Always turn off and unplug the mixer before attaching or removing accessories.
- Never operate the mixer without the bowl and attachments properly secured.
- Keep your hands and utensils away from moving parts during operation.
- Place the mixer on a stable, flat surface to prevent tipping.
- Start at a low speed to prevent splattering and gradually increase as needed.
The Products in This Guide

KitchenAid Artisan Series 5 Quart Tilt Head Stand Mixer
- ✔ Power: 325W
- ✔ Speed levels: 10
- ✔ Color options: Over 20

KitchenAid Stand Mixer Attachment
- ✔ Compatibility: All KitchenAid stand mixers
- ✔ Includes: Multiple grinding plates
- ✔ Material: Metal
KitchenAid Artisan Series 5 Quart Tilt Head Stand Mixer
The KitchenAid Artisan Series 5 Quart Tilt-Head Stand Mixer is built with durable metal construction and features 59 touchpoints for thorough mixing. Its tilt-head design offers easy access to the bowl, making it simple to add ingredients and switch attachments. With 10 speeds, it handles everything from gentle stirring to whipping at high speeds, suitable for small batches or large mixes up to 9 dozen cookies.
Pros:
- Durable metal construction
- Easy tilt-head access
- Multiple speed options
- Large 5-quart bowl
Cons:
- Can be heavy to move
- Requires regular cleaning of attachments
- Limited to KitchenAid attachments
Best for: Home bakers and cooking enthusiasts seeking a reliable, versatile stand mixer.
Not ideal for: Commercial kitchens or heavy-duty industrial use.
Bottom line: A versatile, durable mixer perfect for most home baking needs.
KitchenAid Stand Mixer Attachment
The KitchenAid Metal Food Grinder attachment transforms your stand mixer into a versatile food prep station. It includes fine, medium, and coarse grinding plates, plus sausage stuffer tubes, making it ideal for fresh meat, vegetables, and more. Its durable metal construction and larger tray help process ingredients efficiently.
Pros:
- Versatile grinding options
- Large food tray
- Durable metal build
- Easy to attach
Cons:
- Additional cost
- Requires refrigerator-chilled ingredients for best results
- Attachment sold separately
Best for: Homemade sausage, ground meat, and fresh food prep.
Not ideal for: Heavy-duty commercial grinding.
Bottom line: A durable accessory that expands your mixer’s food prep capabilities.
Frequently Asked Questions
How do I attach accessories to my KitchenAid mixer?
Align the attachment with the mixer’s power hub, then push it in and rotate clockwise until it locks securely. Always ensure the mixer is unplugged during attachment.
Can I use my KitchenAid mixer continuously for long periods?
While the mixer is designed for home use, it’s best to avoid extended continuous operation to prevent overheating. Follow manufacturer guidelines for recommended usage durations.
How do I clean the mixing attachments?
Most attachments are dishwasher safe; however, the pasta roller and cutter set should be hand wiped with a damp cloth. Never immerse the base unit in water.
What should I do if the mixer makes unusual noises?
Turn off and unplug the mixer. Check for obstructions, ensure attachments are properly installed, and verify that the mixer is on a stable surface. If noise persists, contact customer service.
Is the pouring shield necessary?
The pouring shield helps prevent splatters and makes adding ingredients safer and easier, especially when mixing at higher speeds.
Getting the Most from Your KitchenAid Mixer
Proper setup and attachment use ensure your KitchenAid Artisan stand mixer performs reliably for years to come. Always follow safety guidelines, keep your attachments clean, and explore additional accessories to expand its capabilities. With just a little initial effort, you’ll enjoy consistent, professional-quality baking and cooking results every time.
Affiliate disclosure: As an Amazon Associate we earn from qualifying purchases. Prices and availability are accurate as of the time of publishing.
Fall Picks
fall essentials
As an affiliate, we earn on qualifying purchases.